Automatic vs. Manual CDL Restriction: What You Need to Know in 2026
Transmissions play a major role in how commercial trucks operate and in how your CDL is issued. In the trucking industry, there are two primary types of transmissions: Manual and Automatic. Manual transmissions require the driver to shift gears using a clutch and gear selector, controlling engine RPMs and torque delivery directly. Automatic transmissions, on the other hand, shift gears electronically without a clutch pedal, simplifying the driving process.
While automatic trucks are becoming more common in modern fleets, manual transmissions are still widely used in construction fleets, regional carriers, heavy-haul operations, agricultural routes, and older equipment. Because of this industry split, the type of transmission you train and test on directly impacts your license.
Unfortunately, many students don’t realize this before enrolling in CDL school.
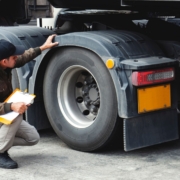
When you take your CDL skills test, the transmission type matters. If you test in an automatic truck, your license will include an “E-Restriction,” which legally limits you to operating automatic transmission commercial vehicles only. If you test in a manual truck, you receive no restriction, meaning you can legally operate both manual and automatic vehicles.
That single testing decision can influence your long-term job flexibility, employer eligibility, and career mobility.
What Is an E-Restriction on a CDL?
An E-Restriction on a CDL means the driver tested in a vehicle with an automatic transmission and is not legally allowed to operate commercial vehicles with a manual transmission.
If you test in an automatic truck, your CDL will display an “E” restriction. To remove it, you must retake the skills test in a manual transmission vehicle. Doing this avoids any transmission-based restriction type.
Let’s break down what that means for your career.
How the E-Restriction Works
When you take your CDL road test:
- If you test in a manual truck → No restriction is added.
- If you test in an automatic truck → You receive an E-Restriction.
With an E-Restriction, you:
- Cannot legally drive manual transmission commercial vehicles.
- May be limited in job opportunities depending on the employer’s fleet.
This restriction applies to both Class A and Class B CDLs.
If you’re still deciding which CDL path is right for you, review the difference on our Class B Passenger vs. Class A Combination CDL: Which License Is Right for You?
Why Manual Training Can Be a Competitive Advantage
While many modern fleets use automatic transmissions, manual trucks are still widely used in:
- Construction and dump truck fleets
- Older regional carriers
- Specialized heavy-haul operations
- Agricultural and rural fleets
Training on a manual transmission gives you flexibility. Here’s why that matters:
1. More Job Opportunities
Some employers require drivers to operate both manual and automatic trucks. If you have an E-Restriction, you may be automatically excluded from certain roles.
Removing that limitation makes you eligible for:
- Broader fleet assignments
- Backup vehicle flexibility
- Specialized freight positions
If this is a big concern for you, our CDL training programs focus on preparing drivers for maximum career flexibility.
2. Higher Long-Term Earning Potential
While pay is usually tied to freight type and endorsements, flexibility increases opportunity.
Drivers without restrictions can:
- Transition between carriers more easily
- Take advantage of niche equipment opportunities
- Avoid being limited during industry shifts
In competitive hiring markets, including the truck and transport industry, fewer restrictions often make you a stronger candidate.
3. Greater Vehicle Control Skills
Learning manual transmission improves:
- Clutch control
- Gear management
- Hill starts
- Engine braking technique
- Overall mechanical awareness
Even if you primarily drive automatic trucks later, manual training builds stronger foundational skills. It’s a skill that will never negatively impact your driving, even if it isn’t always applicable.
Can You Remove an E-Restriction?
Yes! And luckily, it isn’t particularly difficult, categorically.
To remove the automatic restriction, you must:
- Train on a manual transmission vehicle.
- Retake and pass the CDL skills test in that manual vehicle.
- Update your license with the DMV.
However, retesting requires additional time and cost. This is why many drivers prefer to train on manual trucks from the start.
If you have questions about your training options, Contact our admissions team!
Should You Train on Manual or Automatic?
We recommend beginning with manual training, but both options have their own advantages.
Automatic transmission training:
- Easier for beginners
- Less shifting stress
- Faster comfort level
Manual transmission training:
- No E-Restriction
- Maximum job flexibility
- Stronger mechanical skill development
If your long-term goal is versatility and higher mobility within the industry, manual training offers a competitive advantage.
Is the E-Restriction a Big Deal in 2026?
The trucking industry continues shifting toward automatic fleets. However:
- Many companies still operate manual trucks.
- Smaller carriers and specialty operations rely heavily on manual transmissions.
- Having no restrictions keeps your options open.
Even if you never drive manual full-time, not having the E-Restriction removes barriers. There is a possibility that the E-restriction becomes near obsolete some time in the future, but we believe that future has not yet come to pass.
What to do for YOUR CDL Career
An E-Restriction on a CDL limits you to automatic transmission vehicles.
Training on a manual transmission:
- Expands job eligibility
- Increases long-term flexibility
- Prevents the need for retesting later
- Strengthens overall driving skills
If you’re serious about maximizing your CDL career from day one, choosing manual training can be a huge strategic advantage.
If you’re ready to start your CDL training with maximum flexibility in mind, explore our programs now!